Using Django-Taggit in the Django REST Framework
Tags are essentially keywords or phrases that help describe an item with a flat hierarchy. Blog posts, images, movies, and products are some items that are often tagged for things like organization, search, discovery, embedding generation, ML model training, and more.
In this article we will look at how to use tags in the Django Rest Framework(DRF) with Django-Taggit. To do this let's spin up a simple Django project in which we can tag blog posts.
Activate Virtual Env and Install Packages
We will start by creating a Python virtual environment and installing packages for Django, Django Rest Framework, and Django-Taggit.
python -m venv venv
source venv/bin/activate

pip install django
pip install djangorestframework
pip install django-taggit
Create Django Project and App
Executing the following on the command line will create a Django project inside the myproject directory, and create a Django blog app inside of myproject.
django-admin startproject myproject

cd myproject
python manage.py startapp blog
Update Installed Apps
Add rest_framework, taggit, and blog (created is previous step) to the INSTALLED_APPS list in the myproject/settings.py file.
# myproject/settings.py
INSTALLED_APPS = [
    ...
    'blog',
    'taggit',
    'rest_framework',
]
Create Post Model
Within the blog/models.py file we add a model for our blog posts which contains a tags field. Notice that tags is not a traditional model field, but a TaggableManager field.
# blog/models.py
from django.db import models
from taggit.managers import TaggableManager

class Post(models.Model):
    title = models.CharField(max_length=255)
    body = models.TextField()
    tags = TaggableManager()
Make Migrations
Execute the following on the command line to execute the necessary database migrations.
python manage.py makemigrations
python manage.py migrate
Create a Post Serializer
In the Django REST Framework serializers are used to convert model instances into native Python types (or vice versa) that can easily be rendered in a format like JSON or XML. Create the blog/serializers.py file and add a serializer for our Post model. Notice that our PostSerializer inherits from both TagListSerializerField as well as the standard ModelSerializer.
# blog/serializers.py
from blog.models import Post
from rest_framework import serializers
from taggit.serializers import (TagListSerializerField, TaggitSerializer)


class PostSerializer(TaggitSerializer, serializers.ModelSerializer):
    tags = TagListSerializerField()
    class Meta:
        model = Post
        fields = '__all__'
Create Views
We now need to create "views" to handle requests and responses. For this example we will create the PostCreate to create blog posts, and PostList to list all blog posts.
# blog/views.py
from blog.models import Post
from blog.serializers import PostSerializer
from rest_framework import status
from rest_framework.views import APIView
from rest_framework.response import Response


class PostList(APIView):
    def get(self, request, format=None):
        posts = Post.objects.all()
        serializer = PostSerializer(posts, many=True)
        return Response(serializer.data)


class PostCreate(APIView):
    def post(self, request, format=None):
        serializer = PostSerializer(data=request.data)
        if serializer.is_valid():
            serializer.save()
            return Response(serializer.data, status=status.HTTP_201_CREATED)
        return Response(serializer.errors, status=status.HTTP_400_BAD_REQUEST)
Update URL Patterns
Next we will update urlpatterns in myproject/urls.py to map our PostCreate and PostList views to different URLs.
# myproject/urls.py
from django.contrib import admin
from django.urls import path
from blog import views

urlpatterns = [
    path('post/list/', views.PostList.as_view(), name='post_list'),
    path('post/create/', views.PostCreate.as_view(), name='post_create')
]
Create a Sample Post
At this point we are ready create blog posts with tags and retrieve them using the Django REST Framework. Making requests to our Django API can be done with tools like curl or Postman or with your perferred programming language. For this example we will use the UI provided by the Django Rest Framework.
First start our Django development server using the default port 8000.
python manage.py runserver
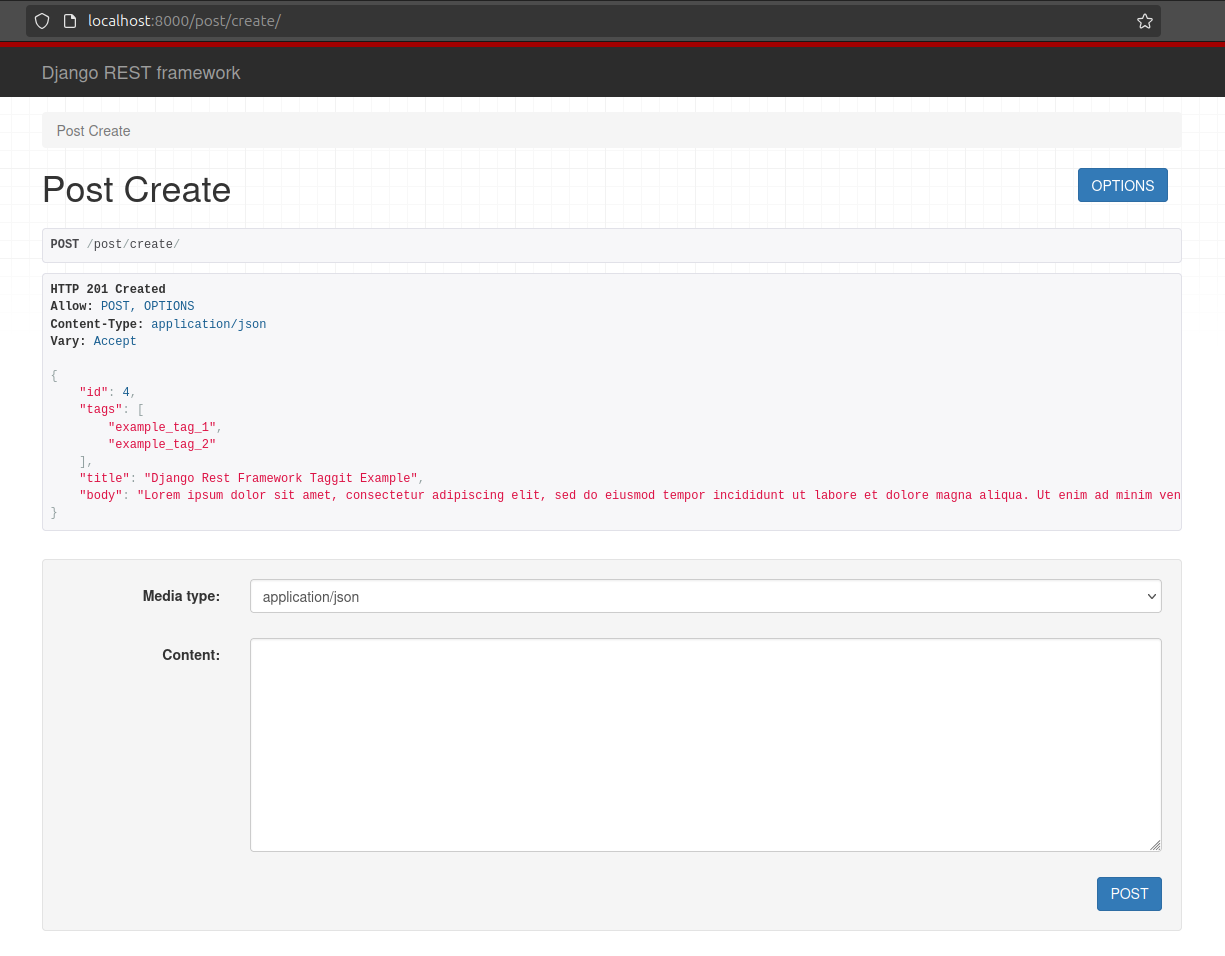
With the server running, open a web browser and navigate to http://localhost:8000/post/create/ to view a simple UI provided by the Django REST Framework. In the "Content" box, we will create our first post with the following JSON object
    {
        "tags": [
            "example_tag_1",
            "example_tag_2"
        ],
        "title": "Django Rest Framework Taggit Example",
        "body": "Lorem ipsum dolor sit amet, consectetur adipiscing elit, sed do eiusmod tempor incididunt ut labore et dolore magna aliqua. Ut enim ad minim veniam, quis nostrud exercitation ullamco laboris nisi ut aliquip ex ea commodo consequat."
    }
With the JSON above in the "Content" box click POST. We are using the POST HTTP request method (you might see a "Method GET not allowed" message on this page, which is expected). After submitting the request, you should see a message like the one below indicating a successful write.
Fetch Posts using Django REST Framework
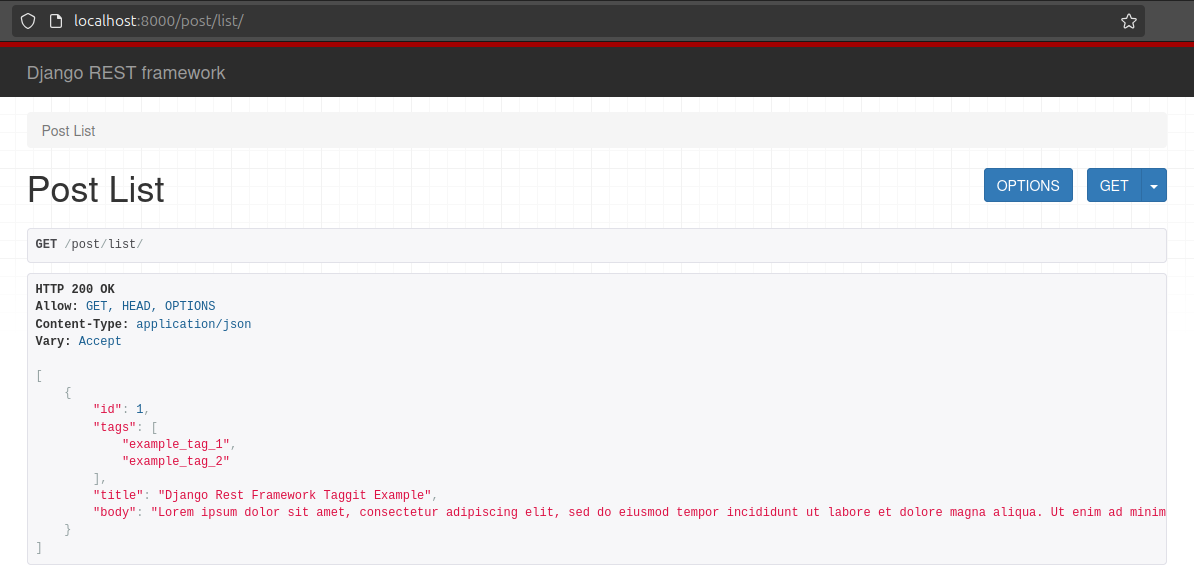
With our newly created blog post, we can now use our PostList view to fetch this post (and any others we have created) as a list. Ensure that the Django development server is still running and use a browser to navigate to the Django REST Framework UI at http://localhost:8000/post/list/.
Your screen should look similar to the one below displaying the all created posts in a JSON list format.
Helpful Resorces
Helpful resources on this topic include the Django REST Framework and Django-Taggit Serializers documentation.