Simple Date Picker in Django Forms (No Javascipt)
When working with forms in Django it can be awkward or even difficult to capture dates in standard form fields. Fortunately Django supports a simple date picker to make this much easier. Even better we can do this without additional CSS or Javascript!
We can add a date picker to our form fields by using the DateInput widget already built into Django. In the tutorial below we will go over the major steps required to get this date picker working in your Django application.
HTML Form Template
Let's first look at our HTML template. Our end goal is to populate the {{ form }} variable with our model form fields and render the HTML in a browser. The HTML action attribute specifies the URL to send the form data to when submitted. In our example we will send form data to /my-form-submit-page/ (not implemented in this tutorial).
The csrf_token template tag seen below is used for cross site request forgery protection. See here for more details.
Here is the task_form.html template containing our HTML form.
<!-- task_form.html -->
<h1>My Task Form</h1>

<form action="/my-form-submit-page/" method="post">
    {% csrf_token %}
    {{ form }}
    <button type="submit" class="">Save</button>
</form>
Form Model
Let's create the Task model to use with our form. In this tutorial our form fields will match the fields in the model. Notice this model contains a DateTimeField. This is the field we will populate with our datepicker.
Here is the models.py containing our model logic.
# models.py
from django.db import models


class Task(models.Model):
    name = models.CharField(max_length=255)
    target_date = models.DateTimeField()
Form Logic
Next let's implement the Django form logic. There are many ways to do this, but for simplicity we will extend the built-in ModelForm class.
Our form class is where we can override field defaults using a widget. To do this we use the widgets attribute of the inner Meta class. Django expects this attribute to contain a dictionary which maps field names to widget classes or instances. In the example below, we map the target_date field to the DateInput widget.
Here is the forms.py containing our form logic.
# forms.py
from django.forms import ModelForm, widgets
from .models import Task


class TaskForm(ModelForm):
    class Meta:
        model = Task
        fields = [
            'name',
            'target_date'
        ]
        widgets = {
            'target_date': widgets.DateInput(attrs={'type': 'date'})
        }
View Logic
Our view is responsible for populating the {{ form }} variable in our HTML template. There are many ways to acheive this in Django, but for simplicity we will extend the built-in FormView class. Here we can specify our HTML template task_form.html and our form class TaskForm.
Here is the views.py containing our view logic.
# views.py
from django.views.generic.edit import FormView
from .forms import TaskForm


class TaskFormView(FormView):
    template_name = "task_form.html"
    form_class = TaskForm
We also need to map our view in our urls.py file. In our example we map our form to the task-form/ path.
# urls.py
from django.urls import path
from datepicker.views import TaskFormView

urlpatterns = [
    path('task-form/', TaskFormView.as_view()),
]
Rendered Form HTML
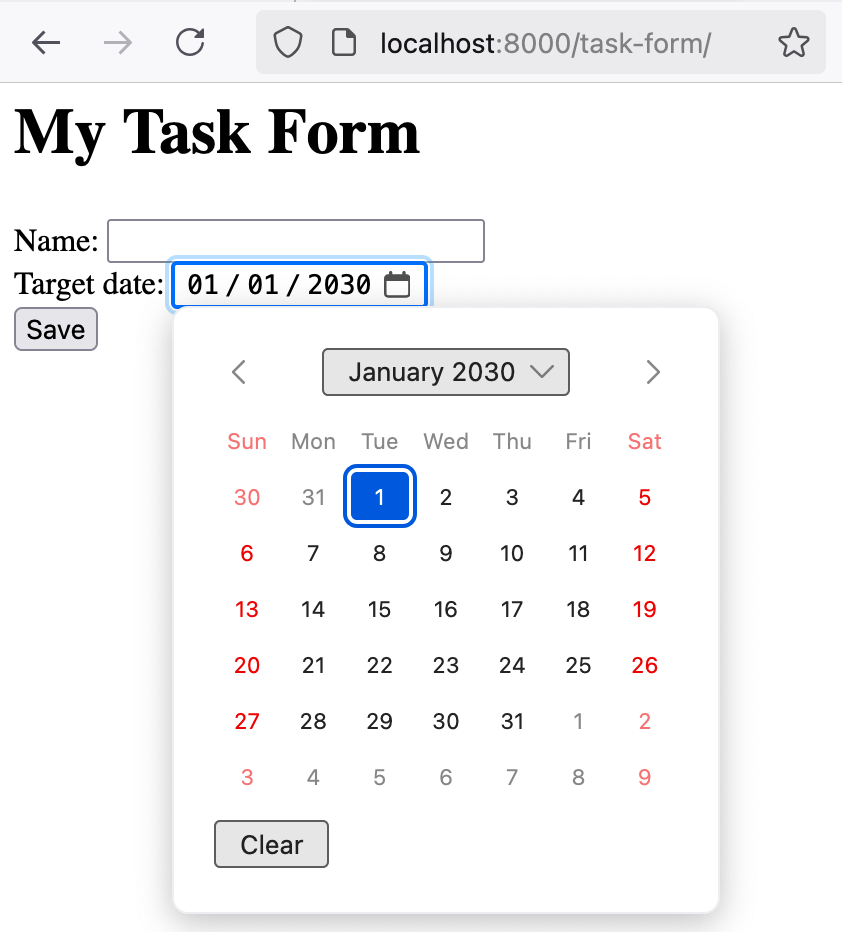
With all of the above set up in our Django project we can now navigate to the task-form/ URL and use the date picker with our target_date field!